Dyeing eggs for Easter is a fun activity for the whole family. The healthy hard-boiled egg becomes a colorful, enticing decoration that enlivens the holiday and makes eating eggs fun. Beautiful, colorful eggs can be obtained by several methods, including commercial dye kits and natural dyes. You’ll enjoy exploring all the ways that these small white canvases can be transformed into eye-catching colors and designs.
Hard Boiling the Eggs
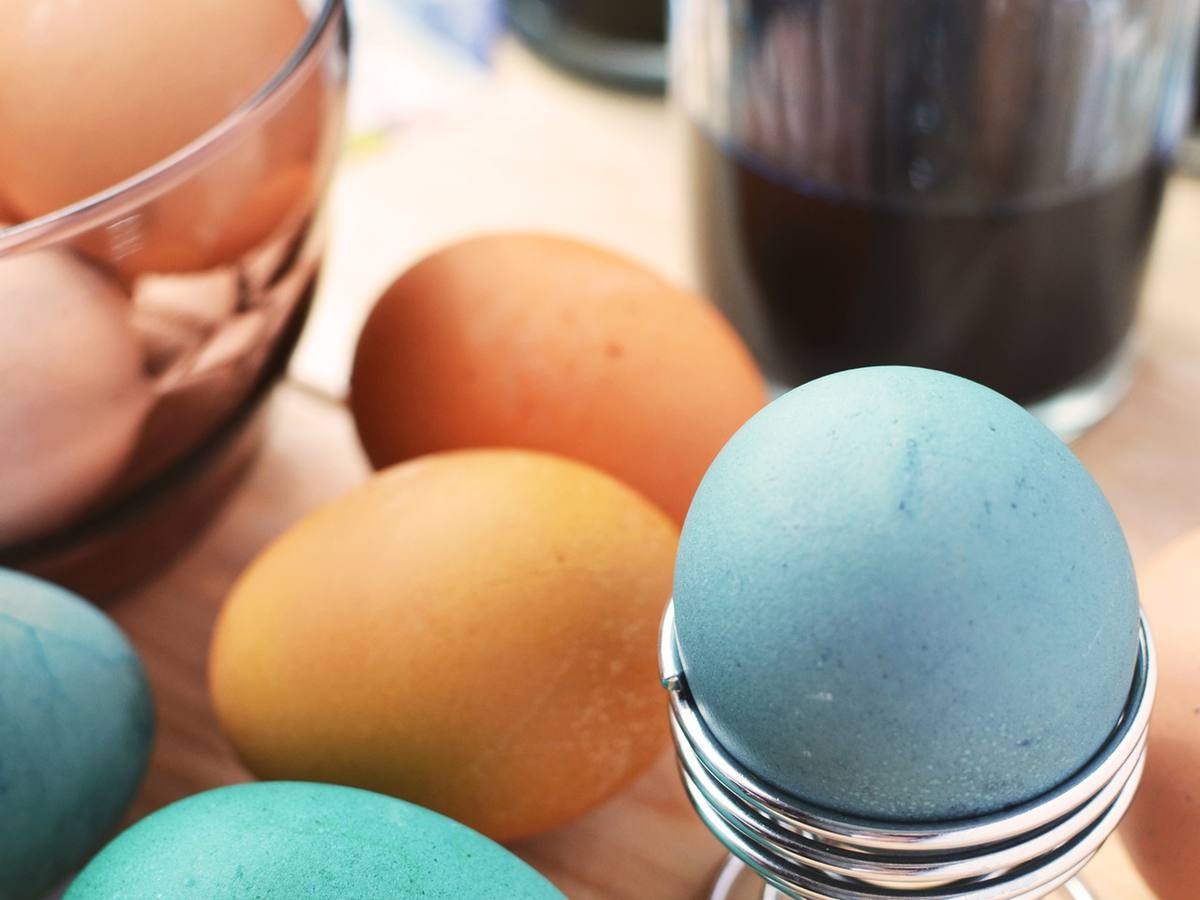
The first step is to hard boil the eggs that you are coloring. Although they can be boiled by regular means, removing the bloom coating from the egg will help the shell accept dye and become more colorful. The bloom is a natural coating on the egg that prevents bacteria from entering the porous eggshell. The bloom can be removed by washing the egg with soap and water or vinegar. A small amount of vinegar can also be added to the egg-boiling water, and it will be added to the egg dyes as well to ensure that you have created a dye bath that will result in vibrantly colored eggs. A simple way to boil the eggs is to add the eggs to a pot of cold water and vinegar, with the water just barely covering the eggs. Bring the water to a boil for 12 to 15 minutes, then immediately transfer the eggs to cold water to stop the cooking process. By starting the eggs in a cold pot and adding just enough water to cover them, you reduce the risk of the eggs being jostled by the boiling water which could cause the shells to crack.
Commercial Egg Dyeing Kits
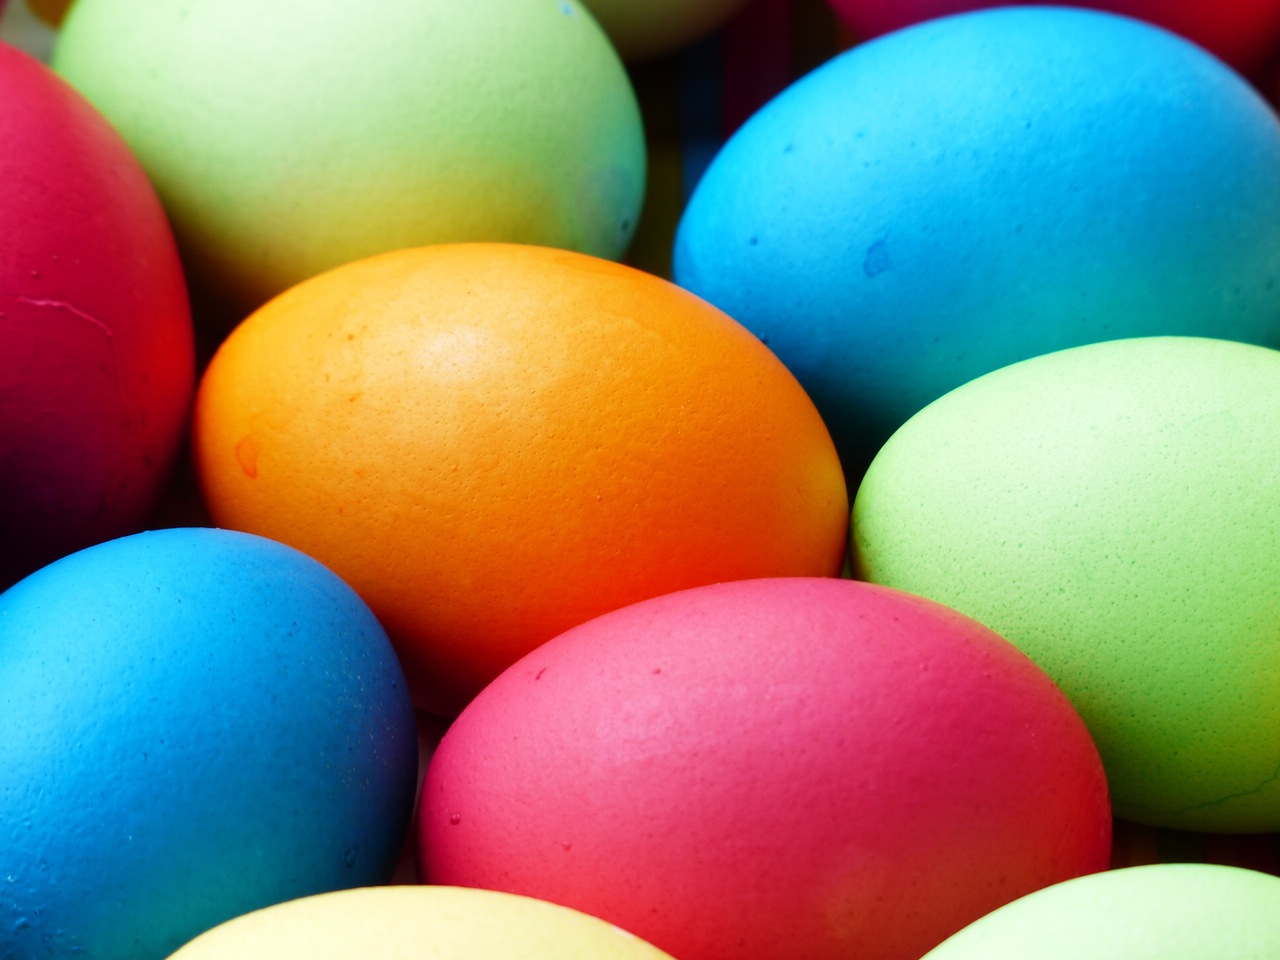
Commercial egg dyeing kits are readily available in supermarkets, drugstores and online. The kits contain several colors of dyes that are typically in tablet form. Although the kit instructions can vary, hot water, a small amount of vinegar and the tablet can be added to a small container to create a dye bath for the eggs.
The Dye Bath Process: Commercial Dyes
Each egg should be soaked in the dye bath until the desired color is achieved. A longer time in the dye bath will typically result in a darker color. Commercial dyes work quickly, so keeping a close eye on the eggs while they are in the dye bath will help you decide when the optimum color has been reached. Eggs can also be added to more than one dye bath to create unique colors; an egg that is added to both a yellow and red dye bath will become orange, for example. The dominant egg color will be the dye bath that is used first and has the best opportunity to soak into the pores of the eggshell.
Different Commercial Kit Methods
Different types of kits may include additional egg coloring tips or products for a unique look, such as egg-marbling methods, non-toxic markers, tie-dye techniques or stickers. Most egg dying methods will require adult supervision for young children, although coloring with crayons, markers or stickers may be a suitable alternative for toddler-age children.
Natural Egg Dyeing Methods
Herbs and spices can also be used to color hard-boiled eggs for the Easter holiday. The colors you achieve with natural dyes may be unexpected, so if you are wanting specific colors, it is best to use commercial dyes. More planning and preparation may also be required to ensure that your natural dyes are intense and colorful.
Spices, Herbs and Teas
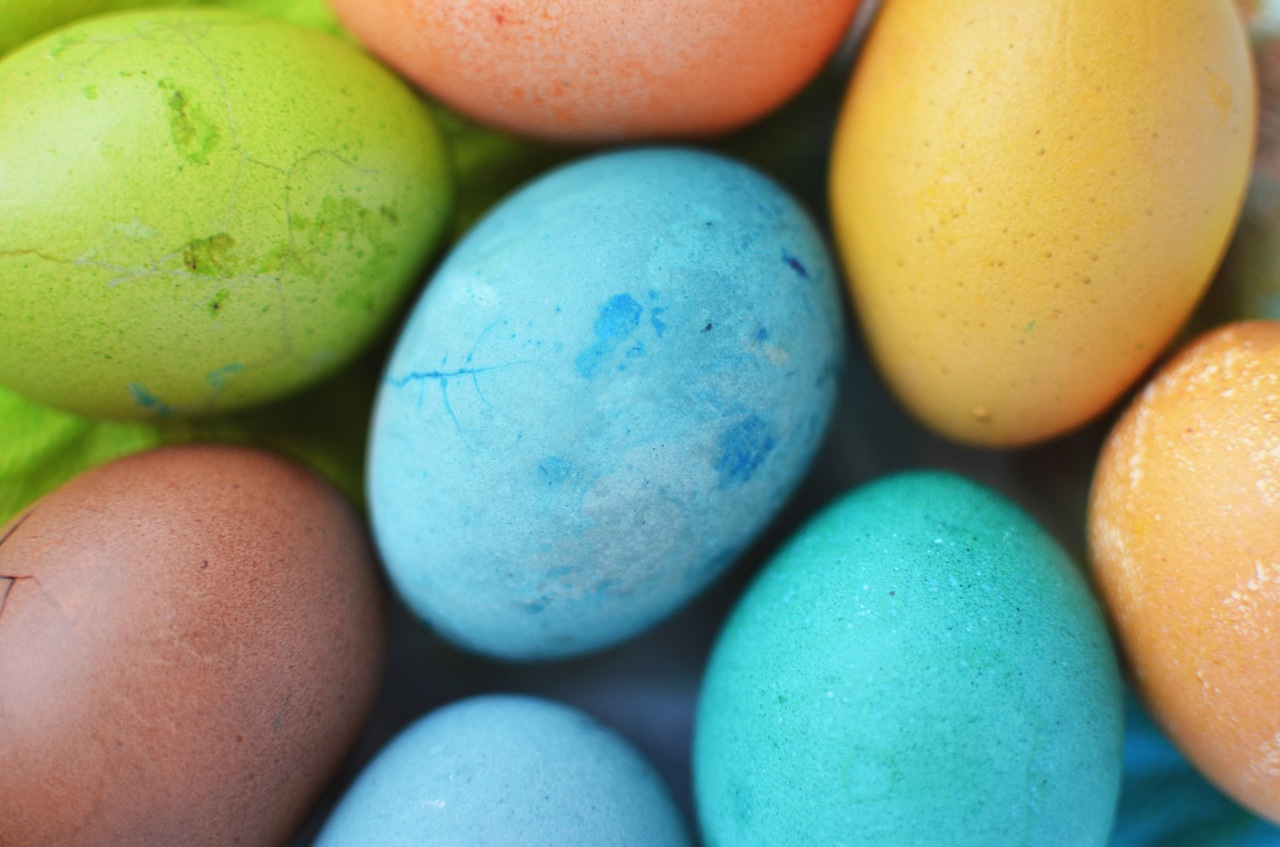
You may already have some of the items you’ll need for natural egg dyeing in your kitchen, including vinegar, onion skins, herbal tea, berries, red cabbage and turmeric. Starting with white eggs will ensure that the colors are bright, but for earth tone and natural colors, beautiful shades can be achieved when starting with brown eggs.
Natural Earthtones
Red cabbage generally creates blue eggs, and in a dye bath with vinegar, you can expect a range of clear blue colors. Turmeric and yellow onion skins create medium-intensity colors ranging from yellow to orange, and camomile tea will create light yellow colors. Black tea tends to create a khaki-brown egg, and hibiscus tea may create colors from red and pink to green, depending on the blend. Berries will color the eggs with the color of their juice, which can be red, pink, blue or purple.
The Dye Bath Process: Natural Dyes
Creating the dyes is very similar to the process used in the commercial egg-dyeing kits with the exception of a boiling process. A cup or two of water combined with a tablespoon of vinegar and the herb or spice of your choice will create beautiful dye baths for your eggs. You will need to use quite a bit of the spice or herb for intense colors - anywhere from a couple of tablespoons to a full cup of natural materials may be required for your dyes. Bring the dye bath to a boil and simmer it for 15 minutes. Let it cool for a short time, then strain any solid materials out of the dye, and your dye bath is ready to use. Place an egg in the dye and let it soak until it is the desired color. With natural egg dyes, it may take an hour or two for the eggs to develop vivid colors.
A Colorful Easter Holiday
With any type of egg-dyeing method you use, when you remove the egg from the dye bath, it should be dried before storage or use. An egg-drying rack or a metal baker’s rack will work well to hold the eggs until the dye is dry. The colored eggs can then be polished with a small amount of cooking oil to add a beautiful shine for all of your Easter events.